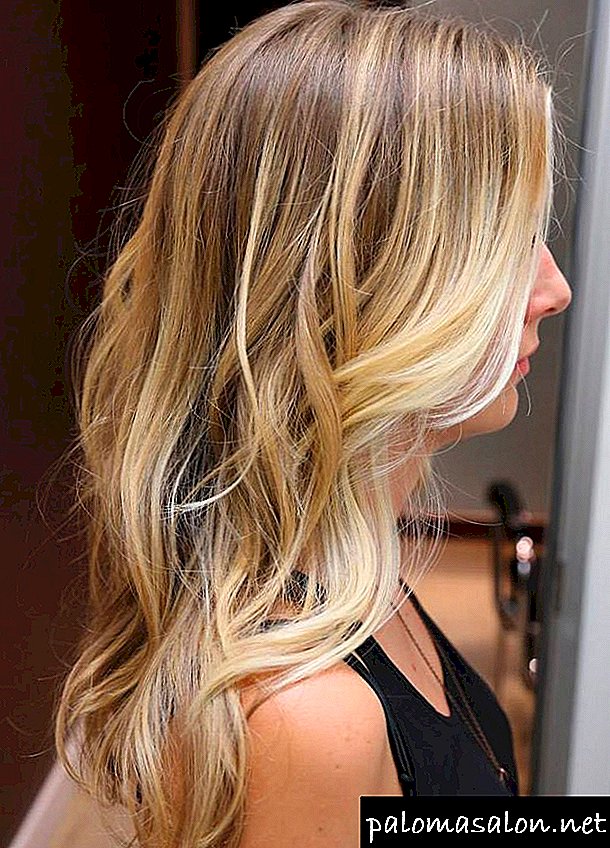
In many beauty salons, highlighting remains one of the most sought after services. This is not surprising, given the advantages of technology. True, the traditional way of a clear selection of curls is still inferior to the palm of other varieties of partial clarification. Similarly, the use of a special cap for hair coloring is gradually becoming a thing of the past. As a rule, hairdressers practice highlighting on foil more often. It is the basis of the American method, veiling, as well as balayazha, brondirovaniya, ombre. The technology has its pros and cons, as well as features of the implementation, which is useful to learn girls who are going to be painted at home.
History of highlighting on foil
 Ancestor of partial shining of the hair is called the famous hairdresser and founder of the network of popular beauty salons Jacques Dessange. The idea arose as a result of his observation of hair fading into the sun.
Dessange, a supporter of everything natural and natural, noticed that the hot sun brightens only part of the curls. He decided to use it in hairdressing, making the transitions between light and dark strands imperceptible. So there was highlighting.
Brigitte Bardot became the first model of an inventive stylist. But there is no exact information about who first decided to use foil in technology. After all, Dessanzh himself is also the creator of a plastic cap with holes through which stretch strands for clarification. However andThe method using foiled paper is referred to as the classical variant of highlighting.
By the way. Another name of Jacques Dessange made history by the invention of haircut garcon, babette hair, electric nippers to create curls Baby Liss and papilothok for permanent perm, the author of which is called his father, René Desange.
Types of highlighting when using foil
There are such types of highlighting with foil:
- Classic. Narrow or wide strands are painted evenly along the entire length. Hair will look more natural if you pick colors that are close to the original shade, and curls take thin.
- Zonal. One part of the head is colored, usually the top. This method gives a visual volume to the hair.
- Partial. Contrast paint emit only a few strands of the entire head of hair or just a person.
- Reverse. It assumes not lightening, but darkening, if the original color is close to the blond. Also, this type is used by girls who want to return to their native Kohler after experimenting with light colors.
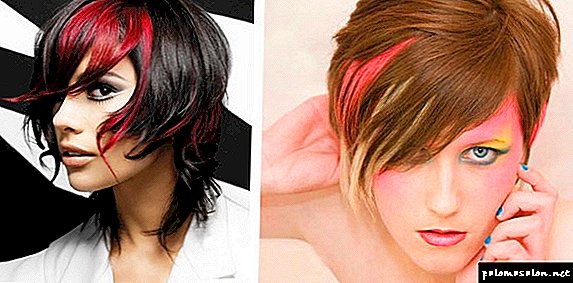
- American. In fact, it looks like a cross between highlighting and coloring of hair. Usually practiced on dark hair, but you can experiment with this way and blondes. For coloring takes a few tones, 3-5. Quite often among them there is a red, red or fiery.
- Veiling. For this method you need to lighten thin, 3 mm strands exclusively in the upper zone. So the effect of a weightless, translucent veil draped over the head will be obtained.
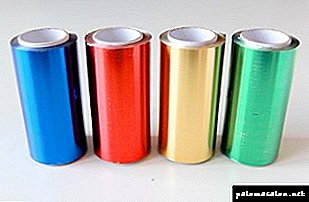
 For the American method is used foil of different colors. Each color is assigned to a separate shade of dye applied to one or another strand.
In addition, variants of hair highlighting are considered such Techniques where the foil is used:
- Balayazh. The dye is applied to the curls, starting only from the middle. Brush or sponge mimic the sweep of the broom, making wide horizontal strokes. For coloring take 2-3 shades, similar to each other.
- Booking. Stepping back from the root zone a few centimeters, the master distributes the dye of light and dark colors along the entire length of the hair. The palette is natural: coffee, honey, golden and other similar. The selected shades should differ from the original color of the curls by no more than 3 tones.
- Ombre. Classical variety - a combination of dark roots with light tips. The transition can be smooth or abrupt. There is also a reverse ombre, when it is not the edges of the strands that are brightened, but the root zone.
Attention! There are techniques, the key feature of which is hair coloring only in an open way, without foil. This is California, Venetian highlighting, shatush.
In some other cases, the use of foil paper or film is a matter of the barber’s skill and the client’s wishes, as well as convenience when it comes to a home procedure. Technologies that allow open and closed painting methods: balayazh, ombre, brondirovanie, as well as the mashimesh and marble staining.
Advantages and disadvantages
Apart from the fact that highlighting refreshes and rejuvenates the appearance, it does less harm to hair than full coloring, the foil method adds the following advantages to the procedure:
- helps to achieve a clear separation of colors
- used on curls of any length, except very short,
- allows you to paint carefully, do not stain the rest of the hair with paint,
- contributes to a more rapid manifestation of the pigment, because the strand inside the foil warms,
- makes it possible to effectively paint over gray hair,
- in the cabin is cheaper than the way in the open air,
- simplifies the process of highlighting at home.
However, there are technology and disadvantages:
- can not control the change in hair color. You have to unfold the strip,
- curls overheat, which is not the best way affects their structure,
- the method does not apply to short hair.
Refuse to highlight, if the hair is badly damaged or recently painted with henna, basma.
What is needed
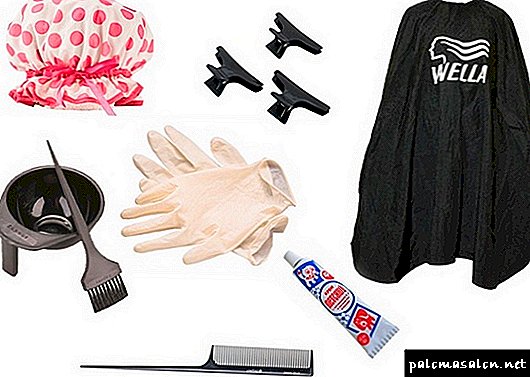
 If you are going to do the staining yourself, prepare the necessary tools and materials:
- a clarifier with an oxidizing agent and / or a paint of the desired shade (1-2 tones are possible),
- capacity for mixing solutions. For each tool - its own. It does not matter whether it is made of glass or porcelain, as long as it is not made of metal. Otherwise the chemical will react with this material. Traces of dye will remain on the plastic
- brushes, sponges or applicators. How many compositions, so many adaptations,
- foil - a special hairdresser or food. The first is more dense, strong and is sold in rolls with already adjusted width.
- gloves,
- hair dressing gown, an old bathrobe or a T-shirt to protect clothes from dripping paint,
- combs - with rare teeth, for combing, and with frequent teeth, for separating the strands (for this purpose it is convenient to take a comb-tail),
- elastic bands, hairpins, hairdresser clips,
- greasy cream or petroleum jelly to treat the hairline, if you plan to dye your hair from the roots,
- towel,
- shampoo,
- balm or mask.
Important! Hair is always placed on the matte side of the foil paper.
Highlighting techniques at home
 Whichever way you choose, First test the purchased paint. If it appears that it causes an allergic reaction, replace the composition. For testing, apply a little on the area behind the ear, the wrist, or the crook of the elbow. At this place should not appear rash, spots, redness, peeling, itching.
The minimum exposure time is 20-30 minutes. Although for a more reliable result it is better to check the condition of the skin after 24 hours.
Any highlighting is done on clean hair. True, the opinions and advice of hairdressers in this regard diverge. Some people think that you need to wash your head on the day of dyeing, others recommend to perform hygienic procedures 2-3 days before the scheduled event. In this case, the hair will not have time to accumulate a lot of sebum, and the thin film that appears will not become an obstacle and will protect the curls from the effects of chemical composition.
Highlight only dry strands.
Prepare the foil strips in advance. The width of each of them should be about 10 centimeters, the length - twice the curl plus 0.5-1 cm for the "pocket". Other calculations are possible in which the tapes are made 4 times wider than the strands, adding a couple of centimeters to the bends on the sides. If the hair is not very long, you can prepare 2 pieces of foiled paper of the same width for each strand. Then their length should coincide with the length of the locks (taking into account the allowance for the bottom bend).
On the bands that you will put under the strands, make small "pockets". They will save the scalp and root zone from flowing paint, will keep a small indent from the roots. To do this, tuck the foil tape from one edge to a maximum of 1 centimeter. Bend do on the matte side. You plan simultaneous coloring by different shades - take a foil of several colors. If you paint curls from the roots, you can do without the "pockets".
Highlighting on short hair, whose length is less than 10 centimeters, is usually done with a plastic cap. In this case, to make yourself staining with foil at home is quite problematic, it is better to contact the master.
The traditional way. Correction

The classical method is used for traditional, zonal, partial highlighting of medium and long hair. You only need to decide which strands and in what volume you will be painting, especially if you plan to do it yourself. Here is what the universal coloring method looks like in stages:
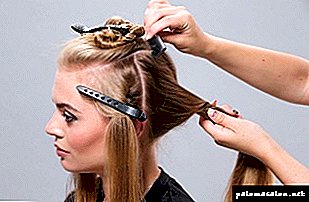
- Carefully comb your hair, divide them into 4–8 zones. Secure each with a barrette.
- Prepare according to the instructions lightening composition.
- Put on an old robe or cape. Protect your hands with gloves.
- Begin coloring from the occipital area. Dissolve one part of hair, comb with a tail, select thin strands for highlighting.
- Take one piece of foil paper. On the matte part of the entire length, apply a narrow strip of chemical composition, bypassing the "pocket".
- Place this piece of foil under the first strand so that the bend is under the roots.
- Moving up from the bottom, color the curl. Make sure the dye does not fall on the "pocket".
- Fold the strip in half or place another piece of foil on top of the colored strand.
- Tie the sides and secure the structure with a clip.
- Perform similar actions with all the curls to be painted, first in the back of the head, then on the sides and on the crown. Bangs - last.
- Stand the time recommended by the manufacturer of the chemical composition.
- Do not immediately remove all the foil, do it gradually. Gently unfold each strip and wash the strand on it so that the rest of the hair does not stain. Perform in the same sequence as the highlighting.
- Apply a lotion or a mask on the curls. Dry your head naturally.
Attention! The procedure is simplified if you need to obliterate a separate zone of the head or just a few curls. The sequence of actions and the algorithm in this case remain the same, but the time for staining is significantly reduced.
To re-highlight the hair on the foil and tint the regrown portion of curls, proceed as follows:
- separate the strand that requires correction,
- put a foil under it, after making a bend on a strip,
- dyed regrown hair
- put another piece of foil on top,
- tuck corners
- do the same with the rest of the strands,
- Hold the desired time, wash off the composition and apply a balm or a mask on the hair.
Preparation for correction is required the same as for highlighting.
Ombre style

How to perform a simple version of the ombre:
- Make a parting on the back of the head crosswise, which will divide the hair into 4 zones.
- Prepare paint, put on gloves and a cape.
- Apply the clarifier to the curls, from the middle to the tips.
- After a maximum of 30 minutes, rinse off the composition.
- Wait until the hair becomes barely wet.
- Divide them horizontally into 2 parts.
- Lay one thin strand from the lower zone on a strip of foil.
- Color the clarified part, moving in the direction of hair growth.
- Place another piece of foil paper on top.
- In the same way, color the remaining curls on the back of the head.
- Form from the upper zone 2 approximately equal parts.
- Retreat a couple of centimeters from the temples, paint all the strands.
- Soak time specified in the instructions to the chemical agent.
- Wash your hair with shampoo, then apply a balm or a mask.
Armoring technique

If you decide to book at home, follow this algorithm:
- Prepare chemical compounds, put on a cape and gloves.
- Moisten your head, comb your hair well.
- Parting with the upper part.
- Form a few narrow strands. To do this, with the help of a comb with a tail, make parting zigzags, placing the pieces on 2 sides.
- Fix the parts above and below the comb separately.
- Lay the first part on a piece of foil.
- Paint it, departing a few centimeters from the root zone. At the ends, apply more composition than the entire length of the hair.
- Reaching the edges of the curls, tuck the foil.
- Take turns applying light and dark dye.
- After processing all the hair, leave them for the time specified in the instructions to the chemical composition.
- Remove the foil and rinse your head until the water is clear.
- Wash hair with shampoo, then use a balm / mask.
Council Blondes may darken their original color before branding, although this is an optional procedure.
By balayazh method
Step-by-step description of the steps of the procedure:
- Protect your clothes with an old bathrobe, t-shirt or cape.
- Carefully comb your hair, highlighting the upper zone and fixing it with hairpins.
- In the lower part, form strands 3-4 centimeters thick. Tie each with a rubber band at the level above which you do not plan to dye your hair.
- Prepare a lightening agent according to the instructions.
- Distribute it to the tails, without going for the gum.
- Gently massage the hair to the paint lay evenly.
- Hair wrap with foil.
- Do the same with the rest of the shag.
- After 10–15 minutes, wash off the brightening compound with warm water.
- Prepare the paint and apply it on the bleached part of the hair.
- Wrap the curls in foil again.
- After a set time, remove the strips, wash your hair with shampoo.
- In conclusion, use a mask or balm.
You can learn more about balayazh, the rules of its implementation on our website.
American highlights
This technique with the use of foil is more similar to coloring and is performed as follows:
- Comb your hair.
- Highlight the lower and middle zones on the back of your head, pick up the rest of your hair with hairpins.
- Prepare the required number of formulations in different containers.
- Wear a robe and gloves.
- Color the bottom strands of color that you want to dominate the hairstyle. Wrap them in the same color foil.
- Do the same with the lower curls on the sides.
- Other strands on the same side paint in other tones, alternating compositions. Cover the finished curls with foil of other colors to know how the shades will be combined in the finished version.
- Move from temples to upper occipital part.
- Then paint the hair in the temporal zone, starting from the bottom.
- Make sure that the shades are located symmetrically on both parts of the head.
- Divide the remaining curls into 2 parts in the center.
- Continue coloring on the lower parting, then on the top, moving to the top of the head.
- Place the foil at an angle from the face.
- Hold the allotted time and begin to wash off the paint. In the first place - with darker strands, in the end - with the brightest, so that the highlighting is smooth, not blurred.
Highlighting veil
To properly perform veiling:
- Divide hair into 2 zones. You will only need the top one, so kill the bottom one.
- Decide on the strands that will be painted. Select them using the zigzag or darning method (from the wide curl form thinner parts and recruit them through one).
- Strands should be no wider than 3-4 millimeters. For convenience, you can immediately put them on pieces of foil.
- Wear a robe or waterproof cloak and gloves.
- Dilute the brightening compound.
- Spread a little bit over the entire length of the foil strip.
- Put on it a strand formed from separate thin parts.
- Color her.
- Place another piece of foil on top (can be replaced with polyethylene).
- Fold the edges of the strip. If necessary, lock the curl barrette.
- Do the same with the rest of the hair. Try to avoid too much time between processing the first and last strands.
- Take the time indicated in the manufacturer’s instructions.
- Remove the foil, rinse the hair with warm water.
An important point! If desired, toned curls. If you take for it a non-sparing tint balm, but paint, set aside the procedure for several days. Let your hair rest after lightening.
There are a lot of options for highlighting with foil, but most of them are not very easy to do at home. If you are determined to do the staining yourself, enlist the help of another person. Working together is more fun, faster and more productive.
To start, do not take for labor-consuming techniques, try to gloss over individual strands. Look at the ready-made schemes, photos of the step-by-step process, find hairdressers master classes on video And only when you feel confident in your abilities, start experimenting with more complex techniques.
What is highlighting?
This is a method of dyeing hair, namely, the lightening of some strands, that is, not all the hair is colored, but only a certain part. Hair is selected by curls of different shapes, widths or the so-called "darning", and after applying the paint are insulated with a special foil, or paper, or with a cap, each strand is painted separately. Coloring drawings can be very diverse, it all depends on the desire of the client and the imagination of the master. Color strands are usually bleaching agents in various forms. They remove pigments from the hair, causing the strands to brighten. The implementation of complex technology in the beauty salon, allows you to achieve the best result, but if you want to acquire the skill of highlighting with your own hands, then you should definitely try.

How to choose a paint?
In salons and hairdressing salons, hair is often dyed by professional means; now you can easily buy them at distribution stores. Amateur paint can be purchased on the shelves of any store. It all depends on the desired result. Conditionally decolorizing agents can be divided according to their form.
Hair powder
This is an innovative tool that allows you to change hair color to 6-8 tones from the first time. Opinions on its safety vary, some experts argue that this tool is very dangerous because of the high pH level. Others say that this does not affect the scalp and does not damage the hair structure. It should be noted that the powder does not have an unpleasant smell, like other clarifiers, and when using it, there is no burning sensation.
Important! This type of dye does not make the hair colored yellow and does not dry them.
In the salons, powder is mixed with oxidizing agents approximately in proportions of 1 to 2. But at home it is very difficult to guess the right tone without experience. Therefore, when deciding to make highlighting to yourself, it is important to carefully read the step-by-step instructions for preparing the composition of the acquired powder brand. Otherwise, you can not achieve the desired shade.
This tool is considered the most aggressive of the existing types of paint due to the fact that the basis of its composition is hydrogen peroxide. Most often it is used to "wash", or rather the rapid transition from a very dark color to light, or even blond. Use it at home is not recommended. It is rather difficult to prepare the composition, and only a qualified master can mix it properly. In addition, if used improperly, you can significantly damage the scalp, get a chemical burn and destroy the hair structure. But this type of coloring agent is the most effective and radical, therefore it is often used in beauty salons.
Cream hair colors
The most user friendly tools. As a rule, such cream-colors are amateur, you can buy them at any store and change the color at home without any difficulty. They are produced on the basis of an emulsion, which makes it easy to mix them and easily paint each hair. There are persistent or ammonia and ammonia-free, gentle cream. Persistent dyes are quite aggressive and in some cases can cause a strong allergic reaction. Ammonia-free act very softly, does not overdry hair and maintains its healthy structure, gloss and silkiness, but it is washed off too quickly.

The best option for highlighting at home is the safest cream paint. It is easier to do it properly clarification non-professional. You can choose a brand by consulting with a consultant or using reviews.
Types of highlighting at home
As in any other segment of care, there is also a tendency in highlighting. When selecting the type of discoloration strands need to consider the length and color of hair. Before the procedure, it is better to view the photo to determine how the selected shade will look on a certain type. There are a lot of views, but it is worth looking at the most popular and fashionable trends today.
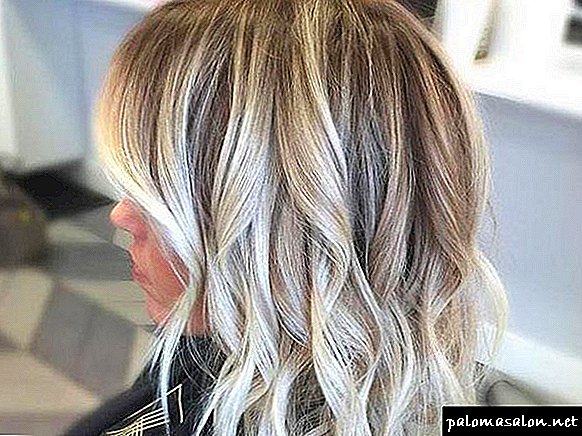
California highlighting
The kiss of the hot sun or Californian highlighting is the most fashionable and popular today. This is one of the types of the so-called ombre. Its undeniable advantage is that it looks very natural, as if just some strands burned out under the sun. In addition, this type of painting visually adds volume and masks gray hairs, as well as regrown roots do not look at all untidy, which makes it less likely to resort to the dyeing procedure. A few simple tips will help determine and understand the benefits of technology:
- It is performed in a sequential technology, even if only the tips are brightened.
- An interesting solution would be to paint over the curls along the entire length, changing their width and saturation in a certain order.
- Tone choose only 1-2 lighter than the mother.
- The end result should look like the natural glare left by the sun.
Naturally and originally such a technique will look on light brown hair of medium length. The process of such staining is extremely complex and multistage, and at home it is better to divide it into several days.
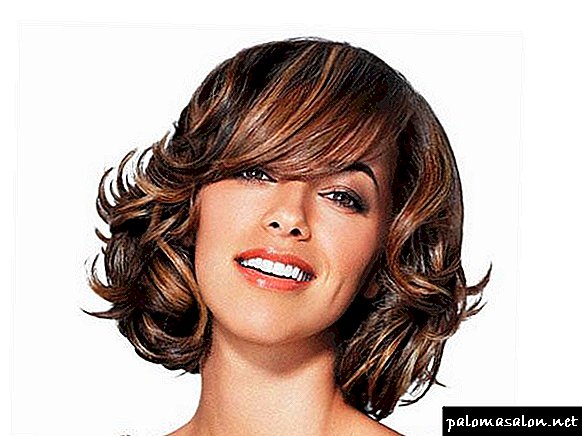
American coloring
A very interesting kind of highlighting is “American” or coloring. Its essence is that the strands are stained with more than one shade, but 3-4, and their tone should be very close to the base one. This method looks favorably on the owners of long hair. The coloring pigment is applied to wide strands, preferably according to a pre-drawn pattern, so that the tones alternate.This will allow the end result to look natural and give the effect of healthy shimmering hair.
If painted with this method at home, it is better to start with the lower strands at the back of the head, then go to the temples and temporal upper strands. The final stage will be the occipital zone. During the procedure, it is better to wrap the dyed hair for convenience in foil of different shades in order to know for sure what tone the strand has if you need to re-apply the dye.

Highlighting the French style
Such a technology has acquired its name, thanks to the company L’Oreal, which first introduced ammonia-free wax paint for highlighting. This is a very gentle procedure that helps to get a very stylish look and does not harm your hair at all. In this technology, the ends of the strands are colored, of different widths and lengths, thus the hair acquires a "glare effect", but only at the ends.
For reference! This look is very suitable for owners of short hair with light brown shade. As much as possible it will be interesting to look at the graduated haircuts.
The technique is simple and easy, even if the highlighting itself is done for the first time.
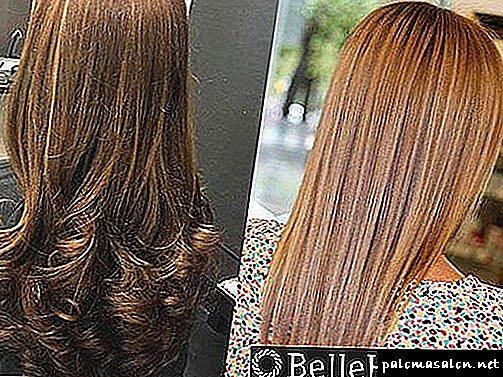
The best solution for highlighting on dark hair will be dyeing using the technique of shatush. Its meaning is in the transition from dark to lighter shades. In this form, a method of stretching the color is used, to put it simply, the paint is shaded along strands, which makes the color of the curls very bright, elegant and unusual. The composition in this type of painting is by no means applied to the roots, therefore shatush is a very gentle technology. In addition, you can forget about regrown roots for a long time. If the decision is made to highlight itself, then you need to first carefully review the photo staining in this technique in order to understand how to do shatush correctly. The procedure takes place in several stages, the work is simple, but it requires careful execution:
- The first step is to separate the hair with partings on the temporal, occipital and parietal zones, and fix them with clips.
- Select strands up to 2 cm wide and carefully comb the ends.
- Next you need to apply the composition of chaotic strokes, carefully shading them.
This is the most fashionable to date types of highlighting, they are not particularly difficult, but without skills, difficulties may arise.
For reference! To learn how to properly perform any kind of painting, it is better to practice first. An old doll or a wig that has gone out of fashion is suitable for this.

Step by Step instructions
Ways staining strands at home is not so much. It is important to choose the most convenient technique for yourself in order to achieve the desired effect. It is better to follow all the instructions clearly, as well as watch the video, otherwise you may be disappointed in the result, and the new hair color will look very unattractive.
Important! The first thing is to prepare the paint, if it is a cream, then no problems will arise, you just need to follow the instructions written in the insert. If it is powder or powder, it will not hurt to consult with a consultant how to prepare the composition correctly.
Regardless of which method is chosen, it is necessary to prepare the following inventory before the procedure:
- coloring agent
- comb with rare teeth, for easy separation of hair,
- a cape so that the paint does not get on the clothes and does not spoil it,
- clamps for zone separation,
- A brush can come with paint, but it is better to buy separately, professional.
- you may need either a foil or a special cap that depends on the method of application,
- disposable gloves.
Coloring hair strands at home can be done in different ways. Step-by-step work depends on the choice of methodology.
Highlighting chaotic
A very interesting way to help achieve a natural effect.Very suitable for home conditions, especially if you want to color in California or American technology. The paint is applied by hand, chaotically only sometimes you need to help yourself with a brush to beautifully shade. After that, a cap is put on and after 20-30 minutes the paint is washed off, and a balm is applied.
There is nothing difficult in highlighting. It is important to remember that you need to follow all the rules and staining at home will delight and pleasure. For the first procedure, you can use the help of a friend, and then offer her your services. With a certain skill, it is not so often to resort to the services of a stylist. This can be done if you want to emphasize the beautiful highlights on a fashionable haircut.
What is required for the home procedure
Prepare for highlighting is necessary in advance. Sets with everything you need are sold in specialized stores. You can also collect items separately.
What you need:
- Powder plus oxidant, forming a brightening compound. For dark hair, 12% oxidizer is required, for light hair, 3% oxidant is sufficient. The thickness of the hair also influences the choice of the composition concentration: the thicker the hair, the higher the concentration.
- Foil strips, cap - depending on the chosen method.
- Hook, comb with a thin handle. With the help of the hook, the strands are dragged through the holes of the cap; with the help of a comb, the strands are separated with a parting.
- Comb brush (before the procedure, the hair must be combed).
- Brush for applying the composition.
- Rubber gloves, old clothesto protect against the effects of an oxidizing agent.
- Towel on the shouldersif the dye will flow.
- Ceramic tableware. In it the mix gets divorced.
- 2 mirrors, to see yourself simultaneously from all sides.
- Shampoo, balm.

After dyeing, the hair is washed. Moisturizing, food needed in the final stage. Balm conditioner will provide additional hair care after highlighting.
What paint to choose
Garnier, Galant, Supra Gold, Palette are very popular. Paint manufacturer Garnier contains olive oil, wheat. They protect the hair from the harmful effects of chemistry, moisturize the hair.
Shades varied:
- super - brightening,
- natural,

- platinum,
- sand.

The cream consistency raises Garnier to the top position in the dye rating. The paint does not flow, evenly distributed over the entire length. Penetrating her hair, she completely paints it.
Palette paint is widely used at home. It allows you to lighten hair with 4-5 shades. Step by step instruction is inside the package. The palette of shades includes tones from ashy to golden blond. The composition of the paint includes orange oil. It protects the hair from the harmful effects of chemistry.
The budget cosmetics include paint company Galant. It attracts the buyer of the composition. Inside the product contains a balm saturated with cashmere proteins.
It restores damaged hair structure, improves their quality. Silk proteins improve the condition of the hair follicles.
The only negative is the smell of ammonia, but it is felt only at the stage of staining.
“Supra Gold” refers to powder dyes. It consists of synthetic and natural ingredients. Dye brightens hair 3-7 tones. With its help you can easily hide gray hair. If unsuccessful staining, it is quickly washed off.
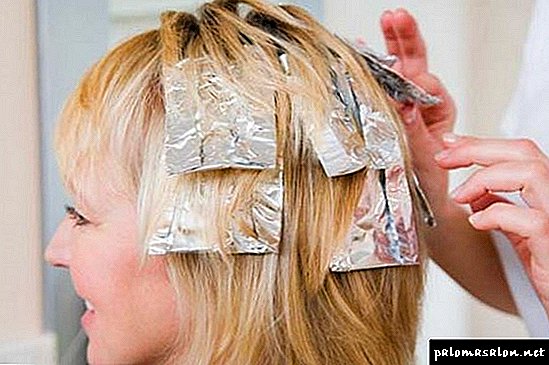
Highlighting with foil
The technique of the procedure is suitable for girls with long hair. It is recommended to start coloring in the immediate vicinity of the parting. Before dyeing the strand, the foil is fixed under the strand. This prevents closely spaced hairs, which do not need to be changed in color, from staining.
The course of the procedure:
- The sheet of foil is cut into strips 7-10 cm long.
- Carefully combed.
- Separate the hair into locks and fix the clips.
- Take one curl and divide it into bundles.

- Brush put paint.
- Wrap the strand in foil.
- Fix the clip.

The thickness of the application of the coloring composition depends on the desired intensity of highlighting. Processing begins with the center of the head, moving to the left and right sides. The back of the head is highlighted last. The exposure time of the composition is determined by the desired degree of staining.
For easy clarification, 15-20 minutes is enough, the average - 20-25 minutes, to get an intensive effect, it will take up to 40 minutes. Then the foil is removed, and the head is washed with warm water. If desired, you can use shampoo. For rinsing use vinegar and decoction of herbs. You can finish the procedure using a conditioner balsam and a nourishing mask.
With the cap
This technique is widely used at home. It is perfect for girls with short hair. The maximum length should not exceed 15 cm.
Highlighting hair at home (step-by-step instruction of this technology involves the use of a hat with small holes, if it is difficult to buy it, replace it with a regular package, making holes in a staggered pattern).
It is executed in the following order:
- Hair streaked thoroughly combed, unwashed, dry.
- Put on a hat.
- Pull through the holes crocheted strands. For intensive clarification strands are drawn from each hole. If the degree of clarification is planned to be average, it is enough to pull out the strands, passing one hole between them. For easy highlighting, a strand is removed from every third hole.
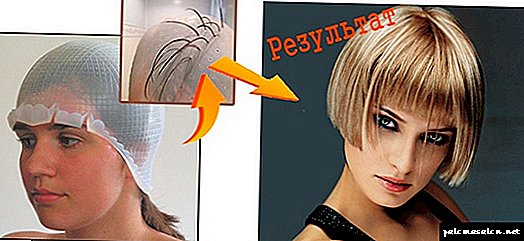
- Apply the dyeing composition with a flat brush to the elongated strands.
- Without removing the cap, wash the curls with warm water. Then get rid of the cap and wash all hair with shampoo. For rinsing use balm conditioner.

With the help of tails
The technique is perfect for short curly hair. A feature of clarification is the need for subsequent frequent cutting. Growing roots are very noticeable. For coloring "tails" need gloves, foil, gum. The latter can be replaced with tape. Before performing the procedure, you need to have a haircut so that the ends of the hair are the same length.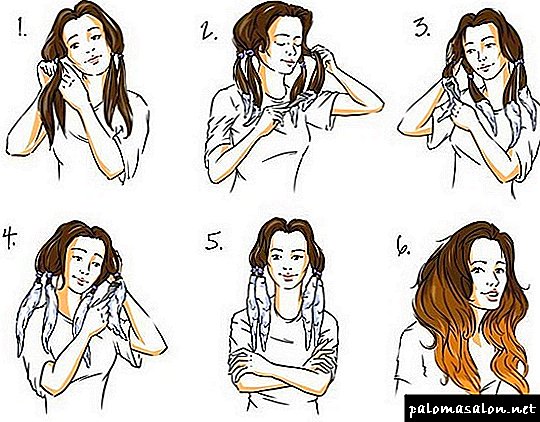
Technique:
- The hair is divided into 3 × 3 or 4 × 4 squares.
- The base of the strands is fixed with a rubber band.
- Tails are made all over the head.
- Wrap the strands in foil, leaving the tips free for 2 cm.
- Put on gloves, put a clarifier on the left ends, making feathers.
- Withstand dye from 25 to 40 minutes.
- Take off the gum.
- Wash off the composition.
The highlighting procedure “tails” is considered easy, an assistant is not required to perform. Before work, cover your shoulders with a towel or cape. Upon completion of the procedure, the effect of regrown roots is obtained. The length of the painted surface regulate as desired.
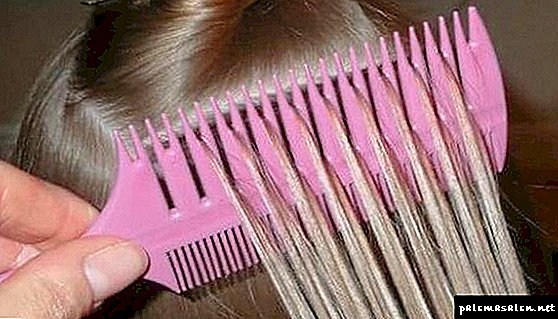
Highlighting with a comb
Highlight hair comb - not a complicated procedure that can be carried out independently at home without an assistant. The method does not require the use of foil.
Also, do not need to monitor the uniformity of the application of the composition over the entire length. More dye may well get to one site, and less to another. This technique creates an interesting visual effect. Special skills for performing staining are not required.
Sequencing:
- Prepare paint, comb not from metal, gloves, towel.
- Take a position in front of the mirror.
- Combed.
- Coloring composition is applied to the comb with a flat brush.
- Comb through the selected strand, starting from the roots.
- Scouring is repeated throughout the entire staining site, including the tips.
- Movement along the entire length should be continuous.
- Withstand the paint required time.
- Wash off.

If the hairbrush highlighting technique is performed for the first time, you should prepare for any result.The effect may be unexpected.
With the help of braids
When you want to refresh your hair, you can do the coloring with the help of braids.
To lighten up a pigtail, you will need:
- a bowl,
- gloves,
- brush,
- hairbrush,
- clamps
- wide fabric to cover
- foil,
- shampoo,
- balm conditioner.
The size and number of braids is optional. Braid them should not be tight. The lightening compound can be applied on top of individual lines along the weaving, in parts, along the entire length. The result is a spotty highlighting.
The output color is light. Partial coloring creates the effect of sun glare in flowing hair. Chaotic stains are similar to leopard spots. The result looks very original. And there is the possibility of using combinations of colors in one spit. This style is more suitable for young girls.
Lightening with pigtails is very convenient, does not require frequent correction.
Venetian
Venetian highlighting well hides gray hair, gives the strands shine, volume. This is a complex type of coloring, lightening on several tones. It differs from the rest by the sharpness of the transition between shades.
Benefits:
- randomness of coloring, giving the effect of pomp, volume,
- suits brunettes, blondes,
- no further correction is needed,
- equally colors hair of any length,
- used on previously painted strands.
Technique:
- The head is washed.
- Apply the composition with a toothbrush, it will paint over even thin hair.
- Stand at least 40 minutes.
- Comb hair and wash off the paint.

Radical highlighting
The advantage of the method is to dye the roots, gray strands without affecting the entire mass of hair. The technique is sparing due to the discoloration of individual sections. This is the main difference between the basal highlighting and the full one.
When the procedure is carried out on already painted hair, toning will be required for a uniform distribution of color over the entire length. Technique performance is complex, requires some experience. Difficulties lie in the selection of the appropriate shade, neat application.
Freshly painted areas should match in tone with previously clarified.
Step-by-step instructions prohibit you from washing your hair before you start highlighting at home. Sebum protects hair from the aggressive effects of chemistry.
Items needed for high-quality clarification:
Stages of implementation:
- hair is divided into strands,
- work starts from the back of the head,
- separate a thin bundle, enclose a foil 10 cm wide,
- process roots with composition, wrap with foil,
- to understand whether the hair is colored to the desired shade, unfold the foil and check the result,
- having achieved the desired result, remove the foil and wash off the composition.
This method is considered the most gentle change in hair color. Using the dyeing technique at home is difficult without certain skills.
Need to buy:
- comb,
- towel or napkin,
- clamps
- paint,
- brush,
- tinting agent.
Sequencing:
- Shoulders are covered with a towel.
- Divide hair into strands with a thickness of 1.5-2 cm.
- There is no need to follow a certain order, they act chaotically.
- Fix strands clips.
- Take one of the strands and comb it.

- The brightening compound is applied with careless actions, easily touching the hair.
- When staining the roots do not affect, retreating from them by 1-2 cm.
- Repeat the action with all strands.
- Wait 40 minutes.
- Wash their heads.
- Apply tint.
- Wash hair with shampoo.
- Rinse with water.
- Apply a nourishing mask.

If you strictly follow the step-by-step instructions, the highlighting will succeed.
How to make highlights for long hair
Highlighting hair at home (step-by-step instruction is required) for long hair is considered time-consuming, takes a lot of time. The procedure is carried out with a foil or brush. The option with a cap does not apply. Foil must choose a dense.Easy will crawl, stained unwanted areas.
Prepare in advance:
- paint,
- comb,
- foil
- brush,
- tank for breeding composition
- towel,
- clock,
- care products.
During the manipulation can not be distracted. We must act quickly. If you lose time during the dyeing process, the strands that are dyed first of all burn out and become stiff.
Progress:
- Wash hair, dry, comb.
- Choose comb strands of 2-5 cm.
- Under each enclose the foil.

- A brush top paint.
- Tuck the end on the foil, then stain.
- Fold the foil, pressed to the treated strands.
- All sites are treated in the same way.
- Stand the time specified in the instructions.
- Take off the foil and wash the hair.
- In conclusion, rinse hair with balm and make a nourishing mask.

The result of clarification depends on the number of painted curls. When there are many, the effect is interesting. But many girls do not stain the whole mass of hair.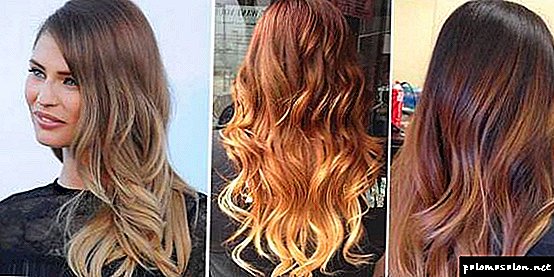
Such highlighting looks good on loose long hair.
Highlights short hair
The advantages of highlighting for short hair:
- Softens rough facial features.
- Creates a beautiful shade of natural tone.
- Visually increases the volume of curls.
- It gives pomp to the hairstyle.
- Highlights the outline of the haircut.
- Suitable for any type of hair.
- When coloring thin strands a smooth transition is obtained.
- Does not harm hair.
- Frequent corrections will not be necessary.
- Helps to create a bright image.
Highlighting hair at home (step-by-step instructions are needed for each method of dyeing) of small length can be made using the mask, Peek-a-Boo, Two-tone diagonal method. The method of coloring is selected depending on the type of haircut.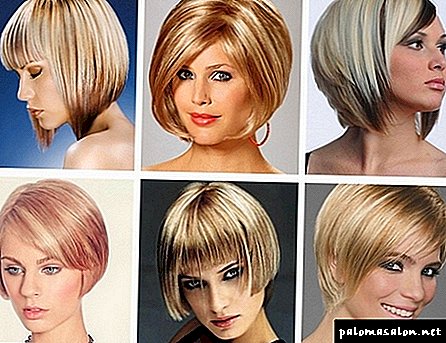
For an ordinary car, a classic variant of highlighting is chosen; a veil of any shade looks better on an elongated one. Choosing the option for the short cascade, you should give preference to the Californian highlighting.
Lightening short hair is not carried on brittle, damaged strands. It should be postponed with highlighting after a recently made perm. You should also be careful to clarify if the hair was previously painted with henna, basma. In all these cases, the result can be unpredictable.
How to keep the brightness of the shaded hair
- Use high quality paint. Natural oils that are part of, retain moisture inside the hair, give them shine and shine. It is recommended to choose formulations without ammonia.
- Shades of red, red prone to fading. The effect is associated with a large size of the molecules of the coloring composition. The paint of such tones does not penetrate deep into the structure of the hair, respectively, washed off faster.
- Do not use shampoo frequently. With frequent washing of the head, the paint molecules quickly wash out. Detergent should be used no more than once every 2 days. To maintain brightness, it is recommended to use dry shampoo, as well as special shampoos for dyed hair.
 With proper hair care, the highlights will last a long time, giving the image freshness and attractiveness
In order to achieve the desired result when conducting highlighting at home, you need to know the rules for using an oxidizing agent. Step-by-step instructions give clear recommendations to follow.
Video about hair dyeing at home
How to perform highlighting yourself at home:
Highlighting on the cap itself:
Features of highlighting
 The classic version involves the technique of highlighting the hair on the foil. Later, open methods of dyeing were invented, and sometimes hairdressers split the treated strands with a transparent cling film. All these variations are not just. The use of foil has both its pros and cons. But, nevertheless, it is successfully used in various types of staining to this day.
Why foil
Many people are surprised when they first see how foil is used in dyeing. Those who at least once carefully read the instructions for resistant paints or brightening compositions, certainly drew attention to the line: "Avoid contact with the metal." And then the treated strands are wrapped in it.
But in fact, food foil, which is used for highlighting, is a very thin aluminum sheet. Upon contact with air, aluminum is coated with a resistant oxide film, which is inert with respect to other compounds. Therefore, in the ongoing chemical reaction, due to which the hair is painted, he does not participate.
But aluminum perfectly retains heat, being a kind of catalyst that accelerates the course of chemical processes. The smell does not pass through the foil (so that you do not have to constantly breathe harmful ammonia fumes), and the paint does not leak.
It is very plastic and allows you to fix the strand on the head without additional clips. So the use of foil for dyeing hair effectively and logically.
Benefits of highlighting hair on foil
The main advantage of highlighting is that this procedure helps to hide gray hair. In addition, this method of coloring visually rejuvenates and refreshes the image.
Here are some more advantages of this hair coloring technique:
- it is performed on any length and hair color,
- the foil allows to achieve bright and saturated colors,
- this is the most gentle method of coloring, since the curls are partially painted,
- does not require frequent color renewal, re-highlighting is done every 3-4 months,
- allows you to smoothly return to the natural color
- helps to visually increase the volume of curls.
Such staining can be done to those who first change the hair color, but if it is no longer its own, you will have to pre-use the desired paint or discolor the curls.
Hairdressers often develop copyright technologies, therefore it is not very correct to repeat the work on photography step by step, especially if you are a beginner. In this case, it is better to ask for help from a color barber.
Important cons
But there is also a negative side of the coin, because of which the search for other painting technologies began. Among the main disadvantages of foil masters call the following:
 it is opaque - in order to check the degree of clarification periodically you have to deploy it,
- the complexity of the whole process increases - the foil must first be cut into strips of the desired length, and then alternately wrap each strand into it,
- the risk of hair burning is increased due to the higher rate of oxidation reaction,
- the foil is almost impossible to securely fasten on very short strands - less than 5 cm long,
- Foil is a consumable that you constantly have to buy, which affects the cost of staining,
- for coloring you have to use color foil or mark strands of different shades.
 it is opaque - in order to check the degree of clarification periodically you have to deploy it,
For short hair the most popular alternative method was to highlight through the cap. But for long foil still remains the best option.
Performance technique
The performance of classical highlighting is quite capable of even a novice master. If you carefully watch the video, which describes all the processes step by step, you can easily learn how to do it yourself at home. With a large length of hair is very uncomfortable, but on medium and short - it is not difficult.
Here's how to highlight the foil in the classic version:
- It is necessary to prepare everything necessary for dyeing and cut the foil of the desired length (2-3 cm longer than the strands).
- Protect hands with gloves and clothing with a waterproof cape.
- Hair is well combed and divided with clips into zones: occipital, temporal and bangs.
- Starting from the crown, separate each strand of hair of the desired width.
- Put a strip of foil under it, bent 1-2 cm at the roots to prevent the paint from contacting the skin.
- Use the long tip of the hairbrush to “stomp” a strand by dividing it into thinner ones.
 To separate the separated part of the hair, apply the brightening compound on the rest.
- Wrap the strand in foil, bend the lower end 2-3 cm and fix it on the head.
- Step by step through the entire head of hair - complete the entire occipital zone, then make the right and left sides, and last - the bang.
- To sustain the necessary time, not forgetting to control the degree of clarification.
- If the desired result is achieved earlier - remove the foil and wash off the paint.
- After completing the staining, thoroughly wash the head under running water.
- Wet with a towel to remove excess moisture.
- Apply a restoring balm or mask and hold for 3-5 minutes.
- Wash your hair thoroughly again, dry it and put it in your hair.
 To separate the separated part of the hair, apply the brightening compound on the rest.
If everything is done correctly, bleached strands are evenly distributed over the head, which perfectly refresh any haircut and hide the early gray hair.
The same scheme can be done coloring. But at the same time, instead of the brightening composition, additional pre-selected colors are used. If dark paint is used, then it should be washed off first, otherwise it will toned light strands. For marking masters use colored foil or various ways of bending the tips.
Possible mistakes
Beginners and those who try to make classic highlighting using foil at home on their own often make the same mistakes:
 the wrong percentage of oxidizer - badly spoils the hair, so the lighter the hair, the lower the percentage
- poor-quality paint - unevenly falls on the hair or gives the wrong color,
- highlighting after henna and basma - must be performed no earlier than 4 weeks after the last dyeing, otherwise the result will be unpredictable,
- brightening black hair more than 3-4 tones at a time - leads to a persistent yellow color that is difficult to bring out,
- an increase in the dwell time of the ink by more than indicated in the instructions can lead to severe hair breakage,
- highlighting on previously painted blond hair sometimes goes into a gray or greenish tint.
 the wrong percentage of oxidizer - badly spoils the hair, so the lighter the hair, the lower the percentage
Most of these errors are fairly easy to fix by a knowledgeable specialist. But you shouldn’t do it yourself - you can only aggravate the situation.
Therefore, if for some reason you were not satisfied with the result of highlighting, it is better to go to another master, show him a photo of what should have happened and find out what else you can do.
Hair care
Unfortunately, highlighting the foil hair spoils more than open. This has to be compensated for by more careful care of the hair, especially in the first weeks after dyeing. To wash it, it is better to use only mild fortified or non-sulphated shampoos and it is imperative to use a rinse aid that moisturizes and facilitates combing.
 Two, and with very dry hair and three times a week, it is necessary to make regenerating masks - purchased or prepared according to popular recipes.
Protect hair from additional damage by using salon procedures: biolamination or shielding. Medical they are not, but visually instantly improve the condition of the hair and prevent them from losing moisture.
It is impossible to comb wet hair, as well as to dry them with hot air. If you already use a hair dryer, then do it from the distance of the outstretched hand and at minimum temperatures. Iron and curling is better to postpone. To create curls there are more harmless devices - papilotki and velcro curlers.
And do not forget about UV filters - the means with them should be used whenever you plan to spend some time under the open sun, even in the winter with no headgear.
What to choose means for coloring
The question of choosing the means for highlighting is the most important one. You need high-quality dye or product that does not dry out the hair, allows you to achieve results without damaging the hair. You can pick up a similar tool from the series of the company Pallete. Among the products of the company there is a special set of "Glare of color". After staining, highlights in different shades on the hair are really present.
 Estel offers one of the most popular color highlighting kits. With their help, you can highlight hair at home with obtaining the same effect as staining in the salon.
Estel takes the lead in hair care. The result of hair dyeing at home will be similar to the salon, if you use the professional series of this company. All proportions must be observed according to the instructions. Another gentle remedy is the paint from the Garnier series. The color after the procedure will be radiant, the hair will be lightened by 5 tones.
Contraindications to highlighting
Before the hair highlighting, regardless of whether it is performed in the salon or at home, a number of contraindications to the procedure are taken into account:
- Dry, brittle hair - highlighting will further aggravate the situation.
- After a perm, do not recommend dyeing.
- After staining with henna no highlighting is performed. Henna unexpectedly reacts to the coloring components of the clarifier, as a result, the color is unpredictable.
What precautions must be taken
How to highlight hair at home, you should know to avoid a negative result.
Adhere to the following precautions:
- Priority: make a test on the surface of the skin to find out if there is an allergy to the ingredients.
- The whole procedure of highlighting should be performed in disposable gloves so that there are no chemical burns from the coloring agent on the skin of the hands.
- The paint is not recommended to keep on hair for more than 45 minutes, otherwise the hair will dry out, their structure will be damaged.
What you need for home highlighting itself
For highlighting hair at home, as in the salon, you should prepare coloring tools and accessories:

- Brightener, which is selected based on the color and type of hair. For hair of a dark shade, a 12% oxidizer is used, and for light-colored ones, a 3-4% oxidizer. It is better to use ready-made formulations.
- Foil that is cut into strips or a silicone cap for dyeing.
- Gloves.
- Special bowl for the clarifying component.
- Brush for coloring.
- Towel - you can take the old, useful to protect clothes from paint.
- Mirrors - needed to provide the necessary overview.
Staining rules
After the method of highlighting hair at home has been chosen, the procedure itself begins. Highlighting performed on unwashed hair.
Starting from the head, following the classic rules:
- initially isolated strand - 1 cm wide,
- then a piece of foil is placed under the strand to be painted, the edges of which are fixed at the base,
- strands of hair are on the foil and they are applied tinting component,
- after the foil is folded in half, another strip of such material can be applied to the painted strand,
- 1-2 cm recede from the original strand and separate the next strand of hair, repeat the procedure all over the head,
- after the time required by the instruction, each strip of foil unfolds and dyed hair is washed with water,
- medical or regenerating masks are applied over the entire length of the hair.
What technique is suitable for highlighting long hair
Owners of long hair fit technique open air. This technique helps to make neat and smooth transitions. As a result of staining with foil strands will turn out clear and bright. But this process is time consuming.
Long-haired girls can use any of the techniques of highlighting, except for balayazh. Skilled craftsmen practice this type of technology, but at home and on their own, it is better not to carry out such staining.
Professionals are advised to do long hair dyeing using the ombre technique. This method is suitable for both dark-haired girls and girls with blond hair. Venetian and Californian coloring styles are no less popular.
How best to dye short hair
How to highlight short hair at home, they do not know everything. Short haircut gives the appearance of a certain charm and charm. But if the haircut to make highlights, the effect will be stunning.

There are 3 styles:
- Two-tone - this is highlighting where two colors are used. They focus on the main shade, which makes the hair volume. Style brings personality to the image.
- Peek-a-bo - hair from the bottom is diluted with dark colored strands. Barely noticeable strands, 3-4 mm wide, give lightness to the image and make the hair bright, contrast.
- Bright curls - highlighting is performed with the addition of bright strands that differ from the main shade of color. This style is more used by young girls. This image attracts the attention of others.


Highlighting with foil: instructions with photos
Highlighting hair with foil is a classic variant of coloring. The foil retains heat and does not allow harmful odors that the composition exudes (they adversely affect health), moreover, paint does not flow through the foil. Coloring with foil is the best option for long hair.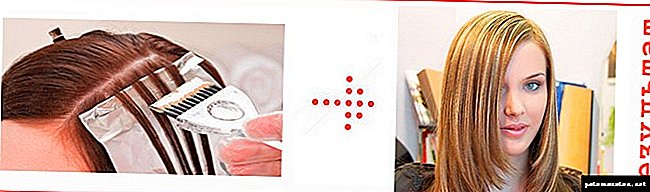

Technique of staining:
- The foil is cut into small strips, 2-3 cm longer than the hair strands.
- They wear gloves on their hands and a waterproof overhang on clothes.
- Carefully comb hair and divide into an occipital zone, temporal and a bang.
- Highlighting should start from the top.

- A strip of foil is enclosed under the strand and bent 1-2 cm at the roots of the hair.
- Next, the strands are divided into thin - 5-8 mm.
- The unnecessary part of the hair is removed, and a lightening component is applied to the rest.
- Again, wrap the strand in foil and bend the end to the bottom by 2-3 cm and fix it on the head.
- This process is done with the entire mass of hair.
- Maintain the appropriate time, wash off with water and apply a balm.


Highlighting with a cap
If it is better to highlight long hair with foil, then a special cap is suitable for dyeing short hair. This silicone-based accessory allows you to make highlights at home, without using the help of a specialist. You will need a set consisting of a silicone cap and a hook.
Performing highlighting, you should adhere to the rules:
- a silicone cap is put on the head,
- hook is inserted into the holes and take out equal in volume strands of hair,
- they are covered with a clarifying agent, which is carefully smeared with a brush along the entire length,
- the composition is kept on the hair for 15-45 minutes,
- then it is washed off, but the cap is not removed,
- this is done after the colored strands are thoroughly washed, then all the hair is washed with shampoo.
If everything was done correctly, hair coloring in home conditions will pass without unpleasant consequences and the desired result will be achieved.
How to make hair highlights using a comb
With the help of a comb, highlighting is rarely used. This is an outdated way. It requires a comb with rare teeth.  The substance to be painted is applied to the comb, and the hair strands are combed from root to tip.
Highlighting with tails

This type of hair highlighting as "tails" or "palm" is used on short hair.
To perform the process of highlighting the necessary devices such as:
At the beginning of the procedure update the haircut. It is necessary for evenly bleached tips of the hair. Then the head area is divided into small equal areas and tails are made.
From the base they are wrapped in foil, leaving only 2-3 cm centimeters open. Paint is then applied to the open areas.
Highlighting with rubber bands
Gum is used during highlighting and on the average length of hair. Such staining will create the effect of regrown roots. This technique involves the separation of hair into three tails. They should be secured with rubber bands, and then apply the paint to the desired length. Wash off the paint without removing the gum. The strands at the base of the hair are darker than on the tips.
Highlighting with the help of braids
Highlighting with the help of braids suitable for girls with wavy hair. With this method you can lighten the strands by 1-3 tones. The head area should be divided into several zones and braid braids. Then the brightening compound is applied to the upper part of the spit along the entire length. After the required time interval, the pigtails should be unstuck and the hair should be washed with shampoo. The final step will be applying a balm. Strands of hair will look rich and volume.
Hand Composition
With the help of hands, without devices, the coloring component is applied to clean, slightly damp hair. This is another method of highlighting hair at home.
For better effect, paint can be applied with brushes for painting or using artistic brushes.
With the help of such brushes the effect of frost and glazing is achieved:
- Frost. Such coloring looks on wavy hair. Clarified strands make the curls visually larger.
- Glazing Applies to very short hair. Before dyeing, foam or mousse are applied to the strands. The process of highlighting is repeated up to 4 times. All staining is done by hand.
Highlighting "in a circle"
For highlighting “in a circle” it is necessary to cut a figure out of paper, and make a hole in the middle. In this hole and should stretch the colored strands. They are carefully arranged in a circle. After applying the painted composition of the head covered with a film. Having sustained the composition, wash hair with shampoo and herbal decoction.
It is believed that this method of staining the easiest of all presented.
Technique highlighting bangs at home
Fashionable trend is highlighting bangs. Dyed locks of thick bangs refresh your hair. Coloring is carried out both on a short bang, and on a long one. You must have a brush for applying paint and foil to wrap the colored strands.
The sequence of highlighting is the same as in the considered techniques:
- with the help of a comb, a strand of width 1 cm
- put a foil under the strand and paint the area with paint,
- in the same way, the actions are repeated throughout the bangs, highlighting the strands at a small distance from each other,
- having sustained the necessary period, the foil is unrolled and the paint is washed off from the hair.
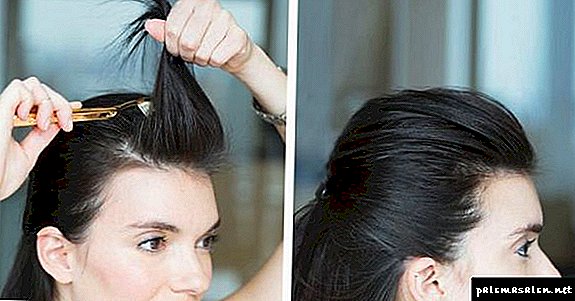
How to make fashion shatush
The natural effect of staining can be achieved using techniques such as shatush. This is a special kind of highlighting, due to which the effect of burnt hair is created.
It is preferable to carry out the staining in the cabin, but you can at home:
- The hair is divided into strands of 1.5 cm in random order and secure them.
- Each strand is necessary to pull and make "bouffant".
- On each strand with a brush, apply a dyeing composition to the pile and blend.
- Having sustained the paint on the hair, according to the instructions, it is necessary to wash off the composition and unravel the "combed" strands.
- Then put a tonic from the center of the hair to the middle, withstand time and wash it off.
If a woman has long and thick hair, then without the help of a specialist shatush can not be done. In other cases, following the rules, you can achieve the desired result.
Balayazh at home
A simple and fast hair highlighting technique is a balayazh. This method, like shatush, helps to achieve the effect of burnt hair. Balayazh usually do on the hair of light colors. Dark hair can also be dyed, but it will take more time and effort, because dark hair should initially be lightened and then taken for dyeing.
Experts recommend a careful approach to the choice of tones. The most common mistake of this coloring is the wrong combination of shades.
In the salons use two shades: the main and lighter. The ends of the hair are lightened completely, but the vertical locks are only 2/3 of the entire length.
Highlighting of hair both in salon conditions and in home conditions is performed in accordance with the chosen technique. In one case, a slight iridescent effect of burnt hair will turn out (Venetian highlighting, a shield), in the other - bright highlighted strands (highlighting through a cap).
Video on how to highlight hair at home on their own
Highlighting hair at home:
How to do highlighting yourself:
Technology of highlighting on foil - step by step description
 First you need to prepare the tools and coloring composition. There is no universal color selection board, it all depends on the starting shade and condition of the hair. Before the procedure, we recommend to consult a hairdresser-colorist.
Coloring is performed according to the following scheme:
- Carefully comb the hair. Divide them into 3 zones: the temporal, crown and occipital.
- Mix the coloring composition according to the instructions.
- Coloring start with the back of the head. Take a thin horizontal strand and zigzag movements separate the strands that will be painted. One part of them will be painted, and the second will remain intact.
- Put a curl on the foil and apply the paint at full length. Fold it in half and tuck the edges, thereby blocking the access of oxygen to the coloring composition. To strengthen the design, you can use plastic clips.
- Perform similar actions with each subsequent strand.
- After 30-40 minutes, as indicated on the packaging of the product, remove the foil and wash your head without shampoo.
- Knead the toning compound, apply with massaging movements, leave for 10-20 minutes.
- Rinse your hair, apply a balm and soak it for 5-10 minutes. Wash off with plenty of cool water.
To control the degree of clarification, from time to time, turn the foil around and check the condition of the strands in different parts of the head. If the desired result is achieved, immediately flush the compound.
Tips for dyeing hair with foil
Here are some things to keep in mind:
- An incorrectly selected percentage of oxidizer can negatively affect the condition of the hair, and the lighter it is, the lower it should be. For example, 6-9% oxidizer is suitable for dark blond girls.
- Lightening black strands is best done in a 3-4 approach. Otherwise, the hair will become dry, which is bad for their appearance.
- Poor paint can not lie smoothly, because of what staining will be "spotty." To avoid this, give preference to professional means of proven brands.
- Do not increase the dwell time of the paint on top of what is indicated in the instructions; this may cause a green tint.
- If a burning sensation occurs, immediately flush away the paint. If a burn occurs, treat this place with Panthenol and consult a doctor.
If the first time to dye your hair properly should not, repeat the procedure in a month. At the same time, remember that lightening more than 3-4 shades can cause breakage of the strands, which is why you risk losing most of the hair.
The order of the highlighting on the foil is well described in this video:
Technician perform highlighting a lot, we have described the simplest - classic highlighting. If you are determined to paint the strands yourself, enlist the help of another person who will control the process from the side.
Highlighting hair with foil at home
So, if you use ordinary foil, you must first cut it into strips. The length should be twice your hair. About 20 cm wide, so that there is enough space on both sides to bend the material further.
In the tank it is necessary to mix the powder with an oxidizing agent; this should be done thoroughly, until a homogeneous mass is obtained, without lumps. Cover your shoulders with a prepared towel beforehand, put gloves on your hands and begin to dye your hair.
Well-combed hair should be divided into sections, each of which is separated by a clip. Comb with a thin handle make parting in the middle of the head, bringing it to the crown. After that, separate the occipital part of the head, holding the comb from the top of the head to the area behind the auricles (on both sides). Thus, you should have three separate zones for work. The back of the head is handled last. In advance, it is also necessary to separate one strand from the face, in the frontal zone, which during work should be glistened parallel to this zone.

If you want to dye only part of the hair, not the whole head, then separate the desired amount of hair, visually with the letter “P”. Starting from the frontal zone to the crown and on the sides you need to take as much hair as you intend to discolor.
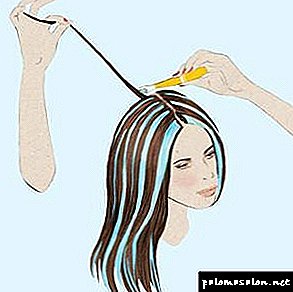
Now we take the hair on one side, remove the clip, after which we separate one strand from the bottom (the thickness may be different, but preferably about 1 cm). The remaining hair is laid on the other side of the head. After that, combing the hair strand, stretching it and combing it with a narrow handle, we begin to divide the hair into two small parts (using the darn technique) in zigzag movements.
Do not touch the lower part, but we will paint the upper part. We take a pre-prepared sheet of foil, matte side out (strand will be put on it). Bend 1-2 cm at the edge - this is done so that the paint does not flow on other hairs and put the foil under the prepared strand. From the edge of the foil it is necessary to retreat about 7 mm and with a brush to paint the hair well.
While curling strands, try to stretch the hair a little with one hand so that they do not slip from the foil. If this situation nevertheless occurred, then carefully slide the tip of the comb into the bend of the foil and pull it up to the top. After painting the strands, fold the foil in half in half and fold it over the edges. The first strand is ready!
Do the same on the other side of the head.
Thus we make the whole head, starting from the bottom, slowly rising up, strand on one side of the head, then on the other, in chess order. When you reach the top, do not forget to color the strand of the frontal zone parallel to the rest.
After you have completely colored the front part of the head, proceed to highlighting the back part of the head (for this, use two mirrors located opposite each other). Doing the same thing, starting from the very bottom up strand by strand.
It is necessary to hold means on a head about 30 minutes.If you want to speed up the process, you can use a hot-air dryer (but it’s worth remembering that this way you will cause more damage to your hair, so it’s best to wait). After some time, you can deploy a couple of strands and see if you should still hold or can already be removed. The back of the head will be stained for a longer time, because, like the tool you applied to that zone last. Therefore, if the front of the head is already sufficiently brightened, then you can remove the foil from this area and gently wash the hair (without touching the back of the head).
After highlighting the curls, it is advisable to apply to the scalp any nutritional mask, or use hair conditioner during shampooing. Repeat the procedure no more than once a month. Or you can dye only regrown roots, without affecting the previously painted hair, so as not to cause even more damage to your hair.

Highlighting with a cap
This method of hair coloring is quite popular among women, especially owners of short hair. Make highlighting using hats at home is easier than ever. For this you will need materials such as:
- Hair bleaching agent (as well as in the version with foil, you must buy an oxidizing agent suitable for your hair shade. It’s better not to save money and buy good products),
- Gloves
- Brush for applying hair dye. You can do without it, many paint the paint with their hands,
- Special cap with small holes. They are sold in specialized stores, there are different quality. Convenient in work are made of silicone, but their cost is much higher. Some people use an ordinary plastic bag and make holes in it in a staggered manner (the most budgetary option, but it will be much more difficult to work with it)
- A crochet hook (it is best to use the smallest size, using it to pull hair strands becomes much easier),
- Towel,
- Capacity for mixing paint with oxidizer
Everything you need for this type of highlighting can be bought either individually or already in the finished set - this is convenient for you.
How to make highlights with a hat at home?
It's all much easier than in the version with foil. Throw a towel over your shoulder, brush your hair well and put a hat on your head. Using the hook, extract the strands from the holes. If you want a very light highlighting, you can go to every other hole. More intense - respectively, go through the crochet into each hole on the cap.
Important: If the cap is new, then before using it, go hook into each hole and break through the material. Such an action should be done only before the first use.
Prepare the paint by mixing the powder with an oxidizing agent. After that, apply the product to the pre-elongated strands. If you want to lighten the hair for one or two shades, then it is necessary to keep the dye on the hair no more than fifteen minutes, for intensive lightening - 30-45 minutes (it all depends on the quality of the material used).
In order to slightly enhance the effect, you can cover the head with a plastic bag and on top with a towel. Some people also use a hot-air dryer because it enhances the reaction, but also damages the hair even more.
When you have achieved the desired color, then carefully remove the cap and wash your head with water and detergent. After the procedure, apply a firming, vitamin mask on the hair.